The rising popularity of DIY moss rugs has captured the attention of crafters, home décor lovers, and wellness enthusiasts around the world. These lush, green, earthy-textured rugs offer a striking and soothing presence in any room. Whether you place them in your bathroom, bedroom, or meditation space, moss rugs instantly elevate your home’s style while offering a sense of Zen and connection with nature. But as simple as they may seem to make, many crafters fall into common traps that can lead to disappointing results, wasted materials, and frustration
At My Craft Master, we’ve guided hundreds of customers through the rewarding journey of crafting their own moss rugs. And with that experience comes insight into the most frequent missteps. In this article, we’ll break down the most common DIY moss rugs mistakes and explain exactly how to avoid them. If you’re planning to start your own moss rug project, read on — this guide could save you hours of time and effort, not to mention help you create a rug you’ll truly be proud of
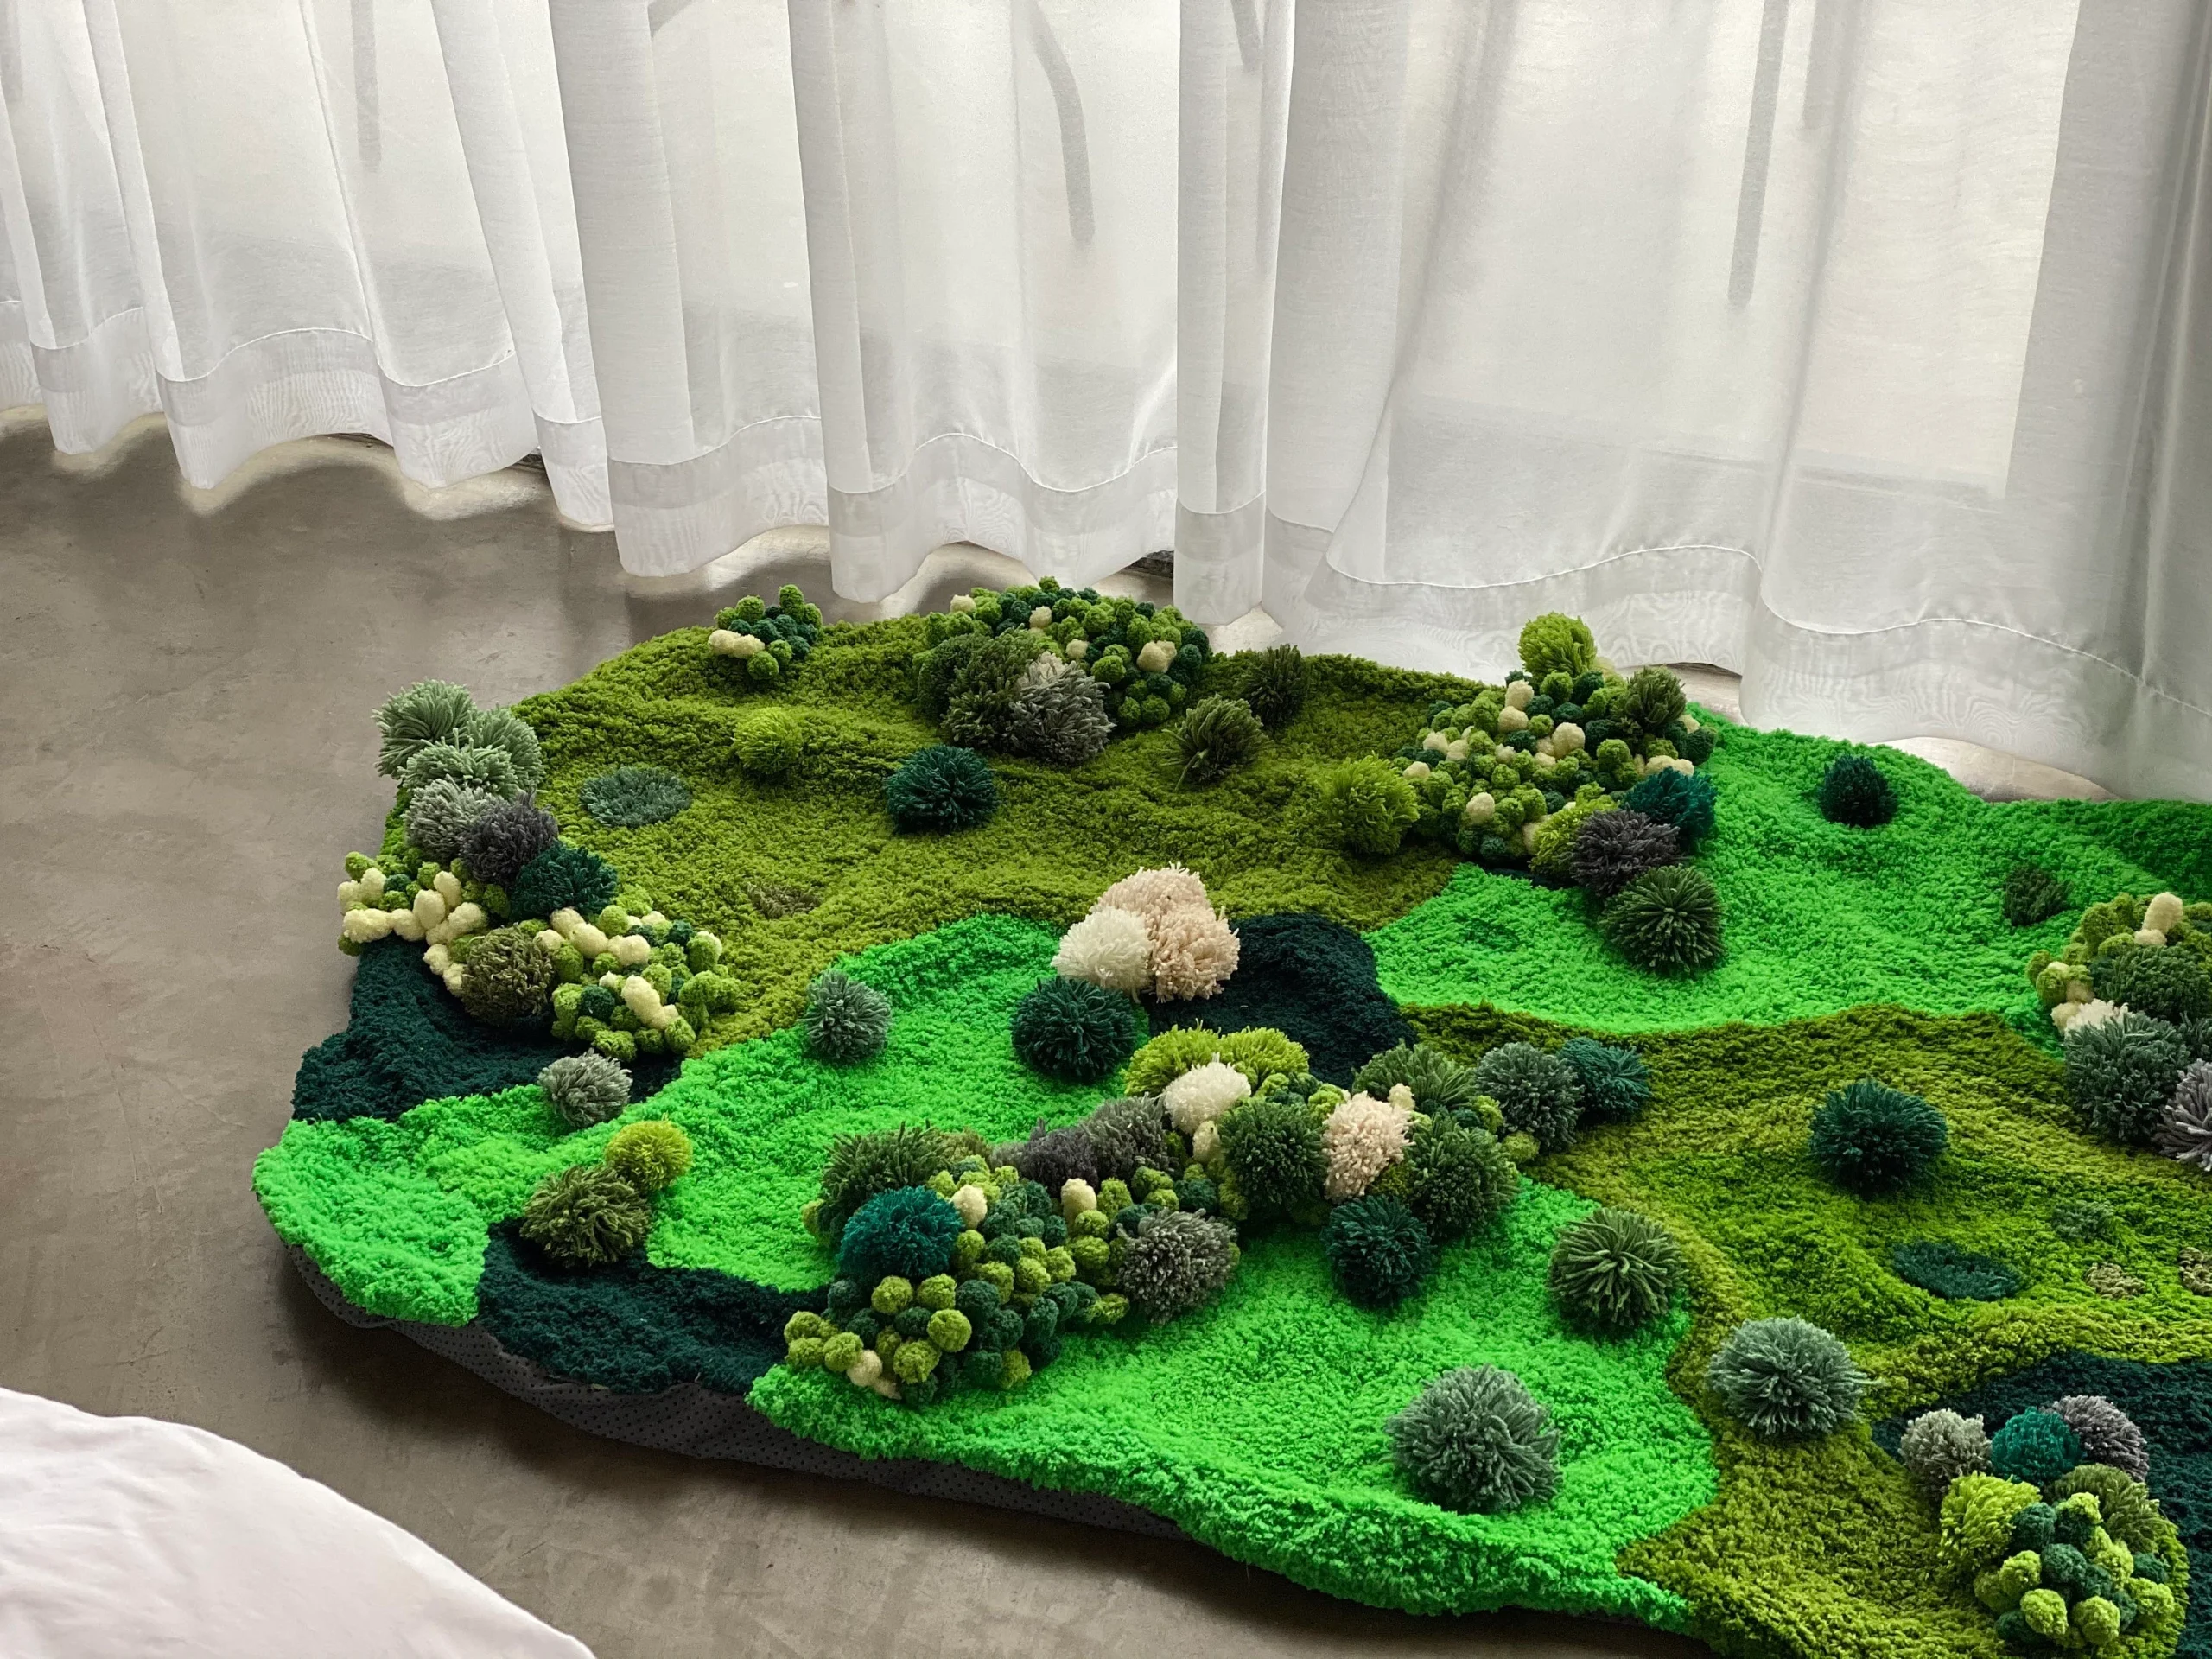
Choosing the Wrong Materials
One of the first and most crucial mistakes beginners make is using the wrong materials. Moss rugs are all about texture and durability. If you choose materials that are too thin, not moisture-resistant, or not suited for your intended space, your rug may fall apart quickly or simply not look the way you envisioned
Avoid using fabrics that fray easily or adhesives that won’t hold up underfoot. For faux moss rugs, opt for high-quality felt, foam, or preserved moss that has been treated for indoor use. Make sure your base mat is strong, non-slip, and water-resistant, especially if you plan to use the rug in the bathroom or other humid areas. Poor material choices are one of the biggest reasons DIY moss rugs end up in the bin instead of on the floor
Skipping the Design Planning Stage
Excited crafters often jump into their project without properly mapping out a design. While spontaneity can be fun, skipping the planning stage often leads to inconsistent textures, awkward shapes, or uneven color distribution
A better approach is to first decide what kind of look you’re going for — whether it’s an organic forest floor pattern, a circular mandala, or a minimalist grid. Lay out your moss pieces before gluing anything down. Take time to experiment with different arrangements and colors. This step doesn’t have to be complicated, but a simple design plan can turn your rug from a messy pile of green into a cohesive, artful centerpiece
Using Too Much or Too Little Adhesive
Adhesive application is a delicate part of creating DIY moss rugs. Using too little glue results in pieces falling off with the slightest movement. Using too much can seep through your moss materials, ruining the aesthetic and leaving a sticky mess
The best method is to apply a moderate, even amount of high-quality hot glue or fabric adhesive and press each piece down firmly until it sets. Make sure the adhesive is compatible with both your base and your moss materials. If you’re using preserved moss, a gentle tacky glue is often best, while felt and foam can handle stronger adhesives. Remember to glue in sections and allow drying time so everything bonds properly
Ignoring Functionality and Placement
A beautiful moss rug is a wonderful addition to any home, but if you ignore how and where it will be used, you risk wasting your time on something impractical. For example, placing a fragile moss rug in a high-traffic hallway means it will wear down quickly. Using delicate materials in a bathroom setting could lead to mold or disintegration
Before starting your DIY moss rug project, think about where the rug will live and how it will be used. Choose your size, materials, and thickness accordingly. If your rug will be decorative and rarely stepped on, you can use lighter, more delicate moss pieces. But if it’s meant to be functional and used often, you’ll want sturdier textures and reinforced backing
Overcomplicating the Design
Another common mistake among enthusiastic DIYers is trying to include too many elements in a single rug. While it’s tempting to add multiple shades of green, textures, and embellishments like faux stones or plants, this can quickly lead to a cluttered look that lacks visual focus
Stick to two or three complementary shades and one or two textures for the best results. A simple color scheme allows the organic beauty of the moss effect to shine without overwhelming the senses. Minimalist designs often result in the most elegant and professional-looking moss rugs. Remember, the goal is to create a piece that brings peace and balance — not chaos
Forgetting to Secure Edges and Corners
Many DIY moss rugs start to unravel at the edges within a few weeks of use simply because the corners weren’t properly secured. If the outer parts of your rug aren’t firmly attached and reinforced, they’ll catch on shoes, pets, or vacuum cleaners and start to peel back
To prevent this, always pay special attention to the edges of your rug. Make sure moss pieces fully cover the base right up to the borders. Apply extra adhesive to the outer rim and press down firmly. You can even consider sewing or binding the edges for added strength. Taking a little extra time here can significantly increase your rug’s lifespan and durability
Not Allowing Enough Drying Time
Crafting requires patience, and moss rugs are no exception. One of the biggest mistakes beginners make is rushing through the drying process. If you start using your rug or moving it around before the glue is fully set, you risk dislodging pieces and weakening the overall bond
After completing your DIY moss rug, set it aside in a dry, well-ventilated area for at least 24 hours. Avoid placing anything on top of it or bending the mat. Let the glue cure properly so your moss pieces stay secure long term. A little patience at this stage goes a long way toward creating a finished product that holds up beautifully over time
Neglecting Maintenance Needs
Some crafters assume that once their moss rug is finished, there’s nothing else to do. But just like any textile piece, moss rugs require a bit of care to keep them looking fresh and beautiful. Neglecting this step can lead to fading, dust buildup, or loss of texture
Regularly vacuum your rug with a gentle brush attachment or lightly shake it outside to remove dust. Avoid soaking or scrubbing it, especially if you’ve used preserved moss. If placed in sunlight, rotate the rug occasionally to prevent uneven fading. These simple steps help maintain your rug’s color, texture, and overall visual impact for years
Final Thoughts
Creating DIY moss rugs can be one of the most satisfying and enjoyable home décor projects you’ll ever undertake. They allow for creative freedom, offer a natural touch to your space, and give you something personal that store-bought items just can’t match. However, like any craft, success depends on careful planning, thoughtful material selection, and good technique
By avoiding these common mistakes, you’ll save yourself time, money, and frustration. Most importantly, you’ll end up with a moss rug that not only looks incredible but also stands the test of time. At My Craft Master, we’re committed to helping makers create stunning home décor with ease and confidence. Our moss rug kits are designed to guide you through the process while giving you the freedom to express your unique style. Don’t let avoidable errors hold you back — start your moss rug project today and craft something you’ll truly be proud of
Frequently Asked Questions
1. How do I know which moss material to choose for my rug?
Faux felt moss is ideal for durability and ease of use, while preserved moss gives a more natural look but requires gentle care. Consider your room’s humidity and usage when choosing
2. Can I machine wash a DIY moss rug?
No, machine washing is not recommended. Clean gently with a vacuum or soft brush and spot clean with a damp cloth if needed
3. How long will a DIY moss rug last?
With proper care, your moss rug can last several years. Using the right materials and avoiding common mistakes can extend its lifespan even further. Click here to return to the homepage and unlock more content.